Showing posts with label botany. Show all posts

Montessori Botany: The Seed


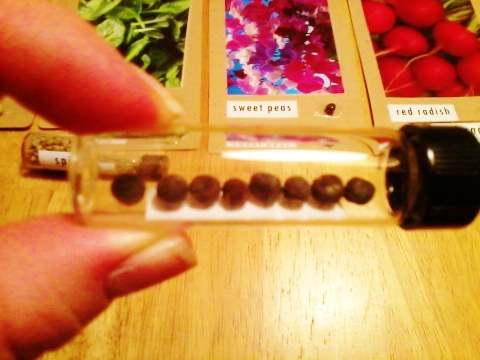
<<< This is a job I made when I wanted the children to learn the names of plants and the seeds they came from. I took the leftover seed packets from the seeds we had just planted. I mounted the pictures to cardstock, with the labels below (century gothic font) and laminated them. I then took seeds that  I had saved and placed them in small vials with the same matching labels. How I was able to place an example of the seed next to its label on the card was simple. I just used some clear tape, taped the seeds down and ironed around the edges of the tape to seal it to the laminated card. I was so pleased with this material. The vials are labled as well so the children are not only object matching but they are scanning to see if the names match as well. I taped the lables to the vials. I bought the small glass vials from sunburst bottle company. I love this company, I use them alot. You should check them out.

Seed sorting is a fun tweezing activity. It's always a good way to cover all you bases when the seeds have been accidentally mixed up in the planting process. Storing seeds and showing the children how to store seeds is easy when you have an embroidery box. You can label the compartments also so you know what is there. I didn't label this box and I didn't know what the seeds were. Ooops! :P


Here are some links to other seed activities that you might enjoy:
Extensions and Experiments:
Books for your library:
A Seed is Sleepy by Dianna Hutts Aston (author) and Sylvia Long (illustrator)

Parts of a SEED 3 part cards:


Dissecting seeds:
Soak Lima beans overnight - make sure that you have one for each child as well as a paper towel for each child. In a group, hand out the paper towels to each child. Pass out the seeds and allow the children to comment on what they see. Show the children how to remove the seed coat. Next, open the two parts of the Lima bean. "This is two parts of the cotyledon which is the food for the plant." Now look more closely to find the embryo which is the undeveloped plant inside the seed. Explain to the children that the baby plant or embryo could have grown into a large plant. Encourage the children to examine the seed parts while completing the three part cards and book.


Montessori Botany - The Root

This is a  3 part card pouch I made to hold the parts of the root. 

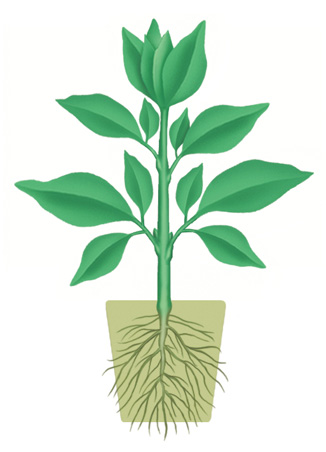
I downloaded these parts of a root cards here by Tanya at the montessorimaterials.org website. There is also booklet there that is meant to a accompany the 3 part cards. During a time, present the roots of the plant using a similar presentation as that of the parts of the plant. Remove the plant from the pot  and place it in a large bowl of water to help remove the soil from the roots. Place a wet towel on a cookie sheet or plastic tray. Remove the plant from the water and place it on the wet towel. Give the children a magnifying glass and ask the children what they see. Name the parts of the root that pertain to the 3 part cards you have: primary root, secondary root, root hair, and root caps. Place the plant with roots covered on your science table for the children to observe. Place the plant in water when you leave overnight.
Primary root: thickest root of the plant  
Secondary root: thinnest roots growing out from the primary
Root hairs: hair-like growths on the roots that absorb water and minerals from the soil
Root caps: the protective part at the end of a root   
            
For an in depth presentation to the function of the root system you will want to do an experiment with a flowering plant (preferably light or white colored petals on the flowers), colored water, and a bucket. During a group time, present the flowering plant to the children and go over the parts of the plant as a follow up lesson the parts of the plant. Remind them of the primary function of the roots which is to receive water and nutrients through the soil. Remove the plant from it's pot, soaking it in water to remove loosening the soil from the roots and root ball. Place the plant in the dark colored water. Place the plant in the appropriate sunlight and allow it to remain there for a few days. Everyday ask the children to observe the changes in the plant. The flowers should begin to turn the color of the water. This experiment gives the children a concrete example of how plants receive water through their roots.
     

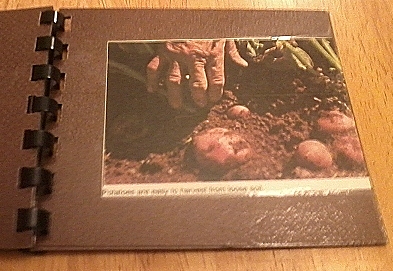
<<< This was a little booklet I made from pictures I cut out of an old gardening book about edible roots. I put it on the botany shelf with the root nomenclature material. Here you can see a gardener digging up edible root potatoes
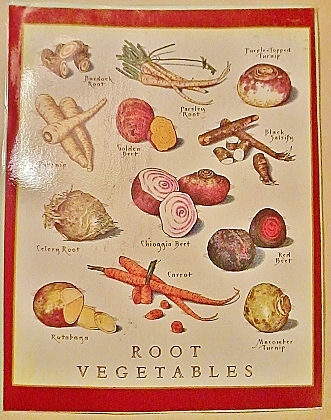
         For a fun root extension, I cut off the back of my cooking magazine that had beautiful illustrations of edible roots. I went to my local produce market and bought as many of these roots I could find, I cut them up into small sample pieces for the kids to taste. We had fun root tasting. The children to my surprise, sampled them all! Note you can also peel sample pieces with a potato peeler :) 

Montessori Botany: the plant


Introducing the plant
Place a small houseplant on the shelf for observation. Introduce the potted plant to a group of children. Carry the plant around the group and allow every child to carefully observe the plant. Ask the children if they have noticed plants in their homes or outside. Encourage conversation about the plant concerning: color,  parts, texture, smell, size, etc.
Talk about the needs of the plant in comparison to other living things. "In order for the plant to stay alive, it needs to be cared for properly."
Show the children where the plant care material will be located (a watering can on a tray, with a sponge) in practical life. Show the children how to care for the plant: water it and place it in a sunny place. "The plant is a special living thing because it makes its own food from the sun."
  • Set up a watering schedule for the plants.
  • Encourage each child to bring a small plant from home to care for in the environment. Send a note home asking them to assist the child in purchasing a plant. Explain to them that their child will learn how to care for their plant throughout the year. Keep a record of who owns which plant, the name of the plant and plant care instructions.
  • Go on nature walks to observe plants outside the classroom
Introduce the parts of the plant the same week and incorporate a hands on lesson. Discuss the difference between inside plants and outside plants. Talk about how many different kinds of plants there are in the world. "A plant can be small as the one on the shelf or as large as the tree outside."
Material:
a small plant, a small bucket with water, a large piece of newspaper, a wet towel
Presentation:
Spread out the newspaper over your workspace. Place the potted plant to your left, place the bucket of water to the right of the bucket, and place the towel to the right of the bucket. Carefully remove the plant from the pot and gently shake off the soil. Talk about how the plant needs soil to stay grounded and takes nutrients from the soil through its roots. Use the water in the bucket to help remove the remaining soil from the roots. Use the damp towel to help preserve the roots when they are not in the soil. Transfer the plant while it is on the towel to a tray to be used in a three part card lesson using the cards below:
Definitions:
Plant Any living organism belonging to the vegetable kingdom
Root The part of the plant that grows into the ground. The root holds the plant in place and absorbs water and minerals from the soil
Stem The main part of the a plant above the ground. The stem supports the branches, flowers, etc.
Branches The parts of a plant that grow out from the stem.
Leaves The thin flat green parts of the plant that grow on the stem
parts of a plant salad:

Present the initial lesson to a group. Lay the labels out in a circle to represent the life cycle of a plant. Allow the children to touch and feel the whole fruit during this lesson. In the lessons to follow, in food prep the children can work with them more closely.
  • try to obtain fresh vegetables so the children can relate parts to whole.
  • In a group setting lay out all the parts cards in a circle. Hold up a food item and help the child classify it according to the card.
  • If you use dressing for the salad you can explain the ingredients to the children
  • In practical life , have the children prepare the vegetables for the salad to be served at lunch.
Serve the salad at lunch family style.

Montessori Botany: The Fruit

parts of a pear

During group time explain to the children that you are going to examine the fruit. Place a pear onto the cutting board, and talk about the shape, color, texture, plant v. animal, where it grows. Carefully cut the pear in half. Otherwise have a pre-cut pear on hand. Be sure to sprinkle the exposed part of the pear with lemon juice to preserve the color so it doesn't start to turn brown. Return the knife and lemon juice to a safe place. Have the children take turns describing what they see. Assist the children in naming the parts of the fruit. Use the 3 period lesson. Place the fruit on the nature table for the children to observe. Make 3 part cards and books available to children.
parts of a pear 3 part cards:

parts of a pear book:


Nomenclature:
pericarp- the walls of a ripened fruit
exocarp- the outer layer of a pericarp
mesocarp- the flesh part of the fruit
endocarp- the inner layer of a ripened fruit
stalk- the part of the fruit attached to the stem
seed- the part of the fruit used to reproduce the species
calyx- the set of fruit sepals of the pear blossom that reamains on the fruit
History:
Pears are native to coastal and mildly temperate regions of the Old World, from western Europe and northern Africa and east across Asia... read more here

montessori botany - the garden

            The purpose of growing a garden is to raise the child's awareness of plants. All aspects of a curriculum can be accessed through the garden. You can design a whole years worth of study around plants - studying their germination (birth), life and death (decomposition). Children learn where natural consumer products actually come from. Before taking on this endeavor, introduce the children to fruits, vegetables, and trees native to where you live. Prepare activities aimed at introducing fruits,vegetables, trees and plants familiar to the children.
        

winter garden snap pea blossom

winter garden snap pea

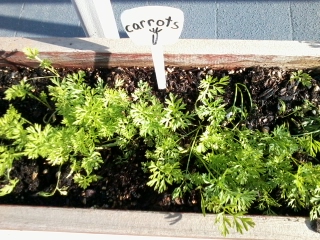
carrots mid December

Gardens awaken an enthusiasm for work, nutrition, learning and community cooperation, responsibility and preservation of the environment. Gardening with children helps develop their understanding of their relationship with nature. Advance planning is important for a successful garden. Consider a sensory garden when selecting your plants. Either way, maintaining a garden promotes gross motor development. Gardening chores such as digging, carrying watering cans full of water, planting and weeding.

Schedule field trips to local lavender farms, berry farms, pumpkin patches, farmers market, orchards, nurseries, etc. Use your local libraries to check out books on plants and horticulture to fill your classroom library. Ask parents if they have old gardening magazines they would be willing to donate for you to use in your classrooms study of plants.

Materials Needed:
buckets, seed markers, desire, commitment, volunteers, sun,water, drainage, soil, access for little people, tools for little people, tool storage, add flowers in the garden to attract pollinators, start a garden newsletter as soon as you have a plan. Plan backwards decide when the harvest will be - preferably before the school year ends so you can have a harvest party!


salad garden to feed the
classroom pets

WORMS are vital to the health of your soil & the
kids love to observe them and hold them

cabbage moth larvae

pests: the children enjoyed seeking these
guys out and picking them up with
tweezers and observing them outside
of the garden

montessori practical life color mixing w/ coffee filter leaves

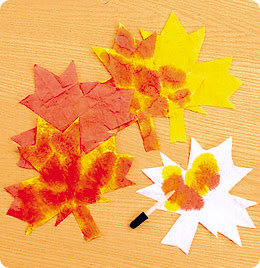
color mixing coffee filter leaves
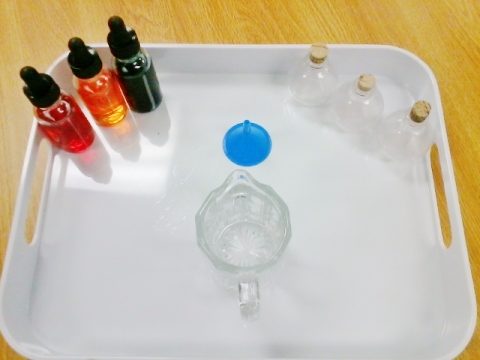
You will need to first introduce color mixing work first. You may place the color mixing work on the shelf set up as shown in the picture below. The leaf coloring work should go after, as it is an extension.


initial color mixing work
You may purchase the coffee filter leaves for this activity from Lakeshore - follow the link below. I always buy my bottles. eyedroppers, small containers etc. from Sunburst Bottle Co. They are very reasonable and reliable. I made a control that matches the outline of some of the leaves offered in the leaf packet from Lakeshore. Print, laminate and keep on the shelf with the job.


Materials needed:
tray
small sponge for spills
small container of toothpicks
laminated color mixing control that matches the patterns of the coffee filter leaves
3 small eyedropper bottles full of colored water (1 blue, 1 red, yellow)
basket to hold leaves
dry rack for leaves to dry
Age 4-6 is an approximation; maturity is key
Presentation:
This activity can be presented to a group or individual child. Invite the child to the lesson (be mindful of the children who still need lessons in the initial eyedropper transfer and color mixing work). Show the child where the material is located on the shelf - practical life (high level of difficulty).
Carry the tray to the table. Sit down on the dominant side of the child. Place the tray above your designated work area. Retrieve the laminated color  mixing control and place it in front of you. Place eyedropper bottles in a line on the tray (red, yellow, blue). Place your coffee filter leaf to the left of you and the control. Begin by twisting the red eyedropper bottle cap off with care. Slowly and carefully place one drop of colored water on each corresponding red colored dot. Continue until all the colored dots are covered with their appropriate colored water. The droplets will resemble candy dots as they stand alone on the surface of the laminated control. Carefully (don't shake the table or move the control) take out one toothpick from the toothpick container. Take the toothpick and with a small circular motion mix one circle full of color at a time. When all the circles have been mixed place the coffee filter leaf on top of the control and watch how the color bleeds in to the white. When there is no more white, peel the leaf off of the control like you would a sticker and place it on the dry rack. Next is perhaps the most important part of all - clean up. Make sure the whole job is dry (you may need a drying towel) and return it to the shelf. Replenish for the next person by placing a leaf on the job for the next person. When the leaves are dry, which doesn't take very long at all, they can be hung or taped up in the window for the light to shine through.

montessori cultural nature table

  PURPOSE: To cultivate and inspire a love of nature and curiousity for what is not yet known or understood.
Suggestions:
           Make sure when planning the layout of your classroom, to incorporate a place for a nature table. The table should be stable and there should be enough room for the children to walk around it. The nature table should be short enough for the children to reach across it without having to stand on their toes to reach. This is a special place. Children are expected to treat the items with the utmost respect as if they were in a museum environment. This is why I try to dedicate at least one shelf in the classroom to botany in addition to the nature table which can house things that the children have collected themselves as well as things from a teacher's private collection. It is the teacher's responsibility to make sure that there are always items of interest on the table and to rotate them regularly. I like to keep a basket of magnifying glasses on the table for the children to examine more closely.
Some suggestions for starting a nature table in your home or classroom: seasonal items, botany experiments, vase of native flowers, leaves, seeds, once living specimens, etc.

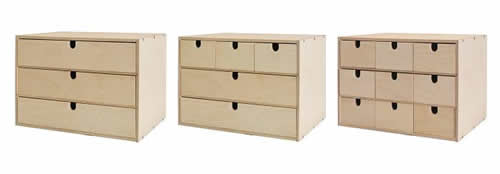
Wooden drawers available at Ikea

EXTENSIONS:
  • Allow children to bring nature items from home and display them on the table.
  • Provide dusters and shelf/ table cleaning work in practical life so the children can help keep the table clean and learn to care for the display items.
  • Buy some drawers from Ikea and orginize your specimens -children can be allowed to take out one drawer out at a time. Drawers are not to be mixed.
  • Make it a job to maintain the table. A "classroom scientist" whose task it is to maintain the appearance of the table can be placed on your daily job chart
LINKS:

montessori nomenclature - parts of a bulb 3 part cards & book


http://www.boston.com/yourlife/home/gallery/1109_tulips/
Its that time of year again! October through November is the perfect time to plant bulbs for early spring blooms. I can't help but get excited by such surprises. Last year when there was nothing much to plant october and november we planted lots of bulbs and we had lots of flowers to study in the spring. If you are planting bulbs with children have them dig the holes and you can apply the teaspoon of bulb food. Always make sure you wash your hands after handling bulbs. Make sure to use real terms when giving directions for planting. For example, "The roots will grow down into the soil; The roots emerge from the basal plate; The tunic will help protect the bulb from the dry cold" etc. etc. There are other ways to observe bulbs. Forcing bulbs is the easiest way to literally watch them as they grow from bulb to bloom. The best bulbs to force (that I've had success with atleast) are amarylis and hyacinths. Another way to learn about bulbs in depth are by learning about the only ones that are edible.

DEFINITIONS of UNDERGROUND STORAGE SYSTEMS:
http://www.montessorimaterials.org/Science/bulbmaterial.pdf

Picture Cards of EDIBLE BULBS:

www.forums.gardenweb.com  www.specialtyproduce.com www.science.howstuffworks.com  www.blackbookcooking.com  www.dealtagger.com  www.folkremedies.net  www.healthnewsonline.org  www.bonapetit.com  www.pyroenergen.com  http://www.sciencephoto.com/media/217553/enlarge


Parts of a BULB 3 part cards


Parts of a BULB Book:


LIFECYCLE of a BULB cards:


Definition of BULB lifecycle terms:
Dormancy The bulb is dormant and has been gathering energy after its spring bloom for the last several months. It will remain this way unless it is harvested for fall planting.

Planting The bulb has been planted and is now forming roots to prepare for winter. It is continuing to gather energy for its blooms.

Pre-Bloom New growth emerges through the soil as soil temperatures warm in the spring and late winter.

Bloom Time The bulb has spent almost a whole year gathering energy for its spring blooms. It has rested and received the proper amount of light, moisture and cold temperatures and is now ready to bloom.

Preparing for Dormancy Once the blooms have faded, the foliage begins to yellow and fade away. The bulb is not dying, but rather gathering energy through the leaves for the next season's blooms.
links: http://www.hollandbulbfarms.com/newtogardening.asp

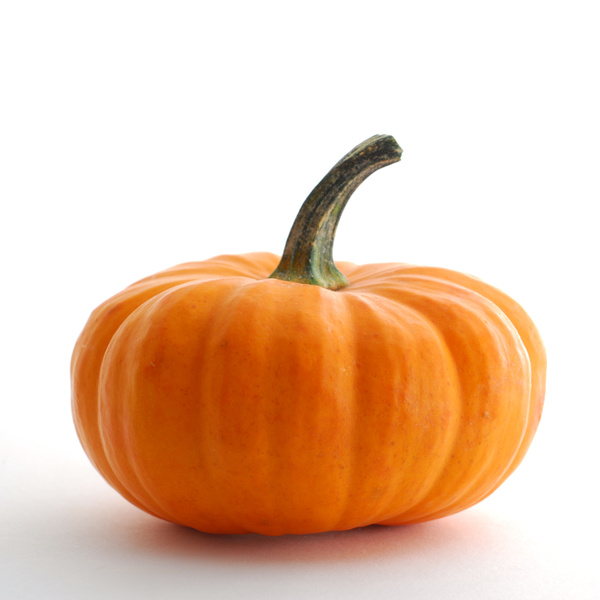
montessori nomenclature FREE Parts of a Pumpkin 3 part cards & book


            During group time explain to the children that you are going to examine the fruit. Place a pumpkin onto the cutting board, and talk about the shape, color, texture, plant v. animal, where it grows. Carefully cut the pumpkin in half if it is a small pumpkin. Otherwise have a pre-cut pumpkin on hand. Return the knife to a safe place. Have the children take turns describing what they see. Assist the children in naming the parts of the fruit. Use the 3 period lesson. Place the fruit on the nature table for the children to observe. Make 3 part cards and books available to children.
Parts of_book PDF
3 part cards PDF


Nomenclature: 
pericarp-      the walls of a ripened fruit
exocarp-      the outer layer of a pericarp
mesocarp-    the flesh part of the fruit
endocarp-    the inner layer of a ripened fruit
History:
              The origin of pumpkins is not definitively known, although they are thought to have originated in North America. The oldest evidence, pumpkin-related seeds dating between 7000 and 5500 BC, were found in Mexico.Pumpkins are a squash-like fruit that range in size from less than 1 pound (0.45 kilograms) to over 1,000 pounds (450 kilograms).
             Pumpkins are a warm-weather crop that is usually planted in early July. The specific conditions necessary for growing pumpkins require that soil temperatures three inches (7.62 cm) deep are at least 60 °F (15.5 °C) and soil that holds water well. Pumpkin crops may suffer if there is a lack of water or because of cold temperatures (in this case, below 65 °F (18.3 °C); frost can be detrimental), and sandy soil with poor water retention or poorly drained soils that become waterlogged after heavy rain. Pumpkins are, however, rather hardy, and even if many leaves and portions of the vine are removed or damaged, the plant can very quickly re-grow secondary vines to replace what was removed.

You might also like:
Life cycle of a Pumpkin- by Montessori for Everyone
http://www.montessoriforeveryone.com/assets/PDF/Life_Cycle_of_a_Pumpkin.pdf

Links: